A relay is an electrically activated switch commonly used to control a higher auxilary voltage (like AC mains) with a smaller one (DC VCC).

The type I most commonly encounter are the general purpose 12VDC/5A 250VAC DPST found in PC power supplies and home electronics. These typically have control on/off voltages of 9.6VDC and 1.2VDC. However, it is possible to modify these to have a much lower DC on voltage.

This is an unsealed relay from either a 'broken' PSU or an old monitor; I'm not certain which but it doesn't matter. On the left you see the coil. The coil has a yoke wrapped around it. On top of the yoke is an armature that is held in one position by a spring. on the other end of the armature are contacts that form the switches.


When voltage is applied to the coil it forms a magnetic field that travels through the yoke and traps the armature to the coil. When the armature is drawn to the coil the contacts are closed together and a circuit is formed. When voltage is remove from the coil the spring brings the armature back to it's initial position, and the contacts are split open.
The control voltages of a relay can be changed by modifying the forces involved.
- {Von,Voff}*Fn/Fo
Reducing the strength of the spring would reduce the amount of magnetic force required to move the armature. - {Von,Voff}+Un-Uo
Changing the deflection of the spring would reduce the amount of magnetic force required to move the armature. - {Von,Voff}*originalpermability/newpermability
Increasing the magnetic permeability of the yoke (mu) would reduce the reluctance of the magnetic circuit increasing the amount of magnetic force focused on the armature. - {Von,Voff}-magnet
Adding a magnet would preload the armature to connect with the coil. - {Von,Voff}-battery
Adding a battery in series would offset the voltages required.
The problems with these are:
- Except for number 3 there is a risk that of going too far and having the arm stick in the closed position.
- Numbers 4 and 5 has introduce a polarity sensitivity and complicates the circuitry required to compensate, and could lead to a latched mode of operation where a VCD less than 0V is required to switch off. Though this could have some applications...
- Numbers 4 and 5 also introduce an element that will degrade over time and are not compatible with AC.
- All of these risk reducing the control off voltage too far to be practical (ie: cope with a 'low' of 1VDC).
To only reduce the control on voltage a more thorough look at how the relay operates is needed.
{video: DMM 0,2,6,10(on),12,10,6,1(off)...}
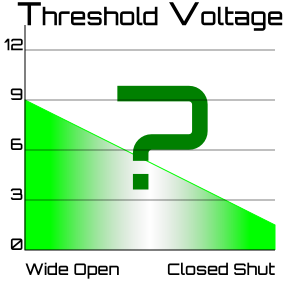
The relay will remain 'off' until it has sufficient voltage to 'click' on (9VDC) and will remain on until it has insufficient voltage to stay on (1.2VDC).
This indicates that from the initial open condition anything less than 9VDC is insuficient to 'turn on', but once it has closed anything more than 1.2VDC is enough to stay on. It can then be inferred that at some point after initial condition a voltage less than 9VDC is sufficient to hold on.

This can be demonstrated by applying 2VDC and poking the armature with a stick. Repeated pokings will reveal that at a particular point of travel the arm will be caught by the coil and close the contacts. this is because as the arm travels the reluctance of the magnetic circuit is reduced as more lines of magnetic force are being caught by the armature and directed into the yoke.
{video: the stick in action}
Therefore if we were to pre-poke the armature we could reduce the control on voltage, and retain the same control off voltage since the other forces are not being changed.
Note: this will also reduce the effectiveness of the contacts in breaking the circuit since the 'open' position will be that much closer to closed.
Relay Modification
This is the a variation on the modification I did with the workshop, however with the abolishment of mandatory shop class so has too the ability to use a knife gone. I can no longer reccomend the use of a knife. If a knife is used, please be careful not to cut yourself, the coil inside the relay, the work surface, other tools, and other people. And if a knife is dropped, please don't catch it with your foot - adrenaline tends to turn a block into a punt- with predictible results.

Take an unsealed relay (identifiable by the plastic tab/notch at the bottom of the cover) and release the tabs holding the cover in place. A shim of plastic or paper may be used to prevent a tab from engag-ge?-g?-ee?-ing.

The cover has a finger that separates the two sets of contacts, and a void for the coil. Drill a small hole through the cover in the void directly over the armature, this will allow us to poke it through the cover.
Test fit the cover to make certain that the hole is over the armature and no other part. Adjust/widen if necessary.

Glue a nut to the hole. Make certain that the screw for the nut passes through the hole. This can be accomplished by puting the screw and the nut to the hole when you glue it. Be careful not to glue the screw yet.
While a screw could be put directly into the plastic cover it would be less secure and to be tapped out of its hole by the armature long after this has been forgotten about.
In this example I've used a 'nut' from a spare switch and duct tape to affix it to the relay. This is a bit of foil tape left over from my garage door repair, that has held through two winters without leaking or coming loose.
Replace the cover on the relay, and thread the screw into the nut.

Adjusting the relay can happen in one of two ways.
- Apply desired 'new' control voltage on to the coil and slowly tighten the screw until the relay closes (and make certain that it opens again at the desired control voltage off.)
- with out power to the coil tighten the screw until the contacts close then back off the screw until they open
The first method has the advantage of maximizing the contact separation when open, while the second minimizes the control voltage on.
In this example a minimum control voltage on of 2.7 VDC was achieved; lower values are not possible without modifying the contacts. The ability to extinguish sparks/arcing at this level is likely inadequate for practical application.
Glue the screw to keep this re-calibration.
Applications:
Reducing the VCC required for the control circuit allowing basic TTL control of an otherwise unsuitable relay.
Decreasing the response time of a relay for communications.
Running relays in series to reduce current draw from a control circuit in a kludge/fix.
Manually actuated relay as part of a power-return-control kludge.
Also, The parts for the SSD and cube have finally arived, but I am too busy to play with them. I won't be fixing the awful formatting in this post until I have the video from the workshop.
